
So, Calvin’s been sleeping in a room with creepy quetzals (or some other bird…I’m not an ornithologist) since we moved in, but we’ve left it up until we could decide what the long-term plan was for the bedrooms, and also because we had other projects on the docket first. A few months ago, the kids started sleeping together on weekends and, for the most part, they’ve done pretty well with this arrangement. The idea of bunk beds came up at some point, so we all decided that the kids would share a bedroom for a few years, and the other room would serve as the kid’s “play room.” For various reasons, Calvin’s room seemed like the better choice for “sleeping,” while Meg’s substantially larger space would become the “play room.”
As we already knew, plaster was behind the wallpaper. Some parts of it were cracked, necessitating patching with plaster and joint compound, but there wasn’t substantial damage to the plaster like we had down in the music room.
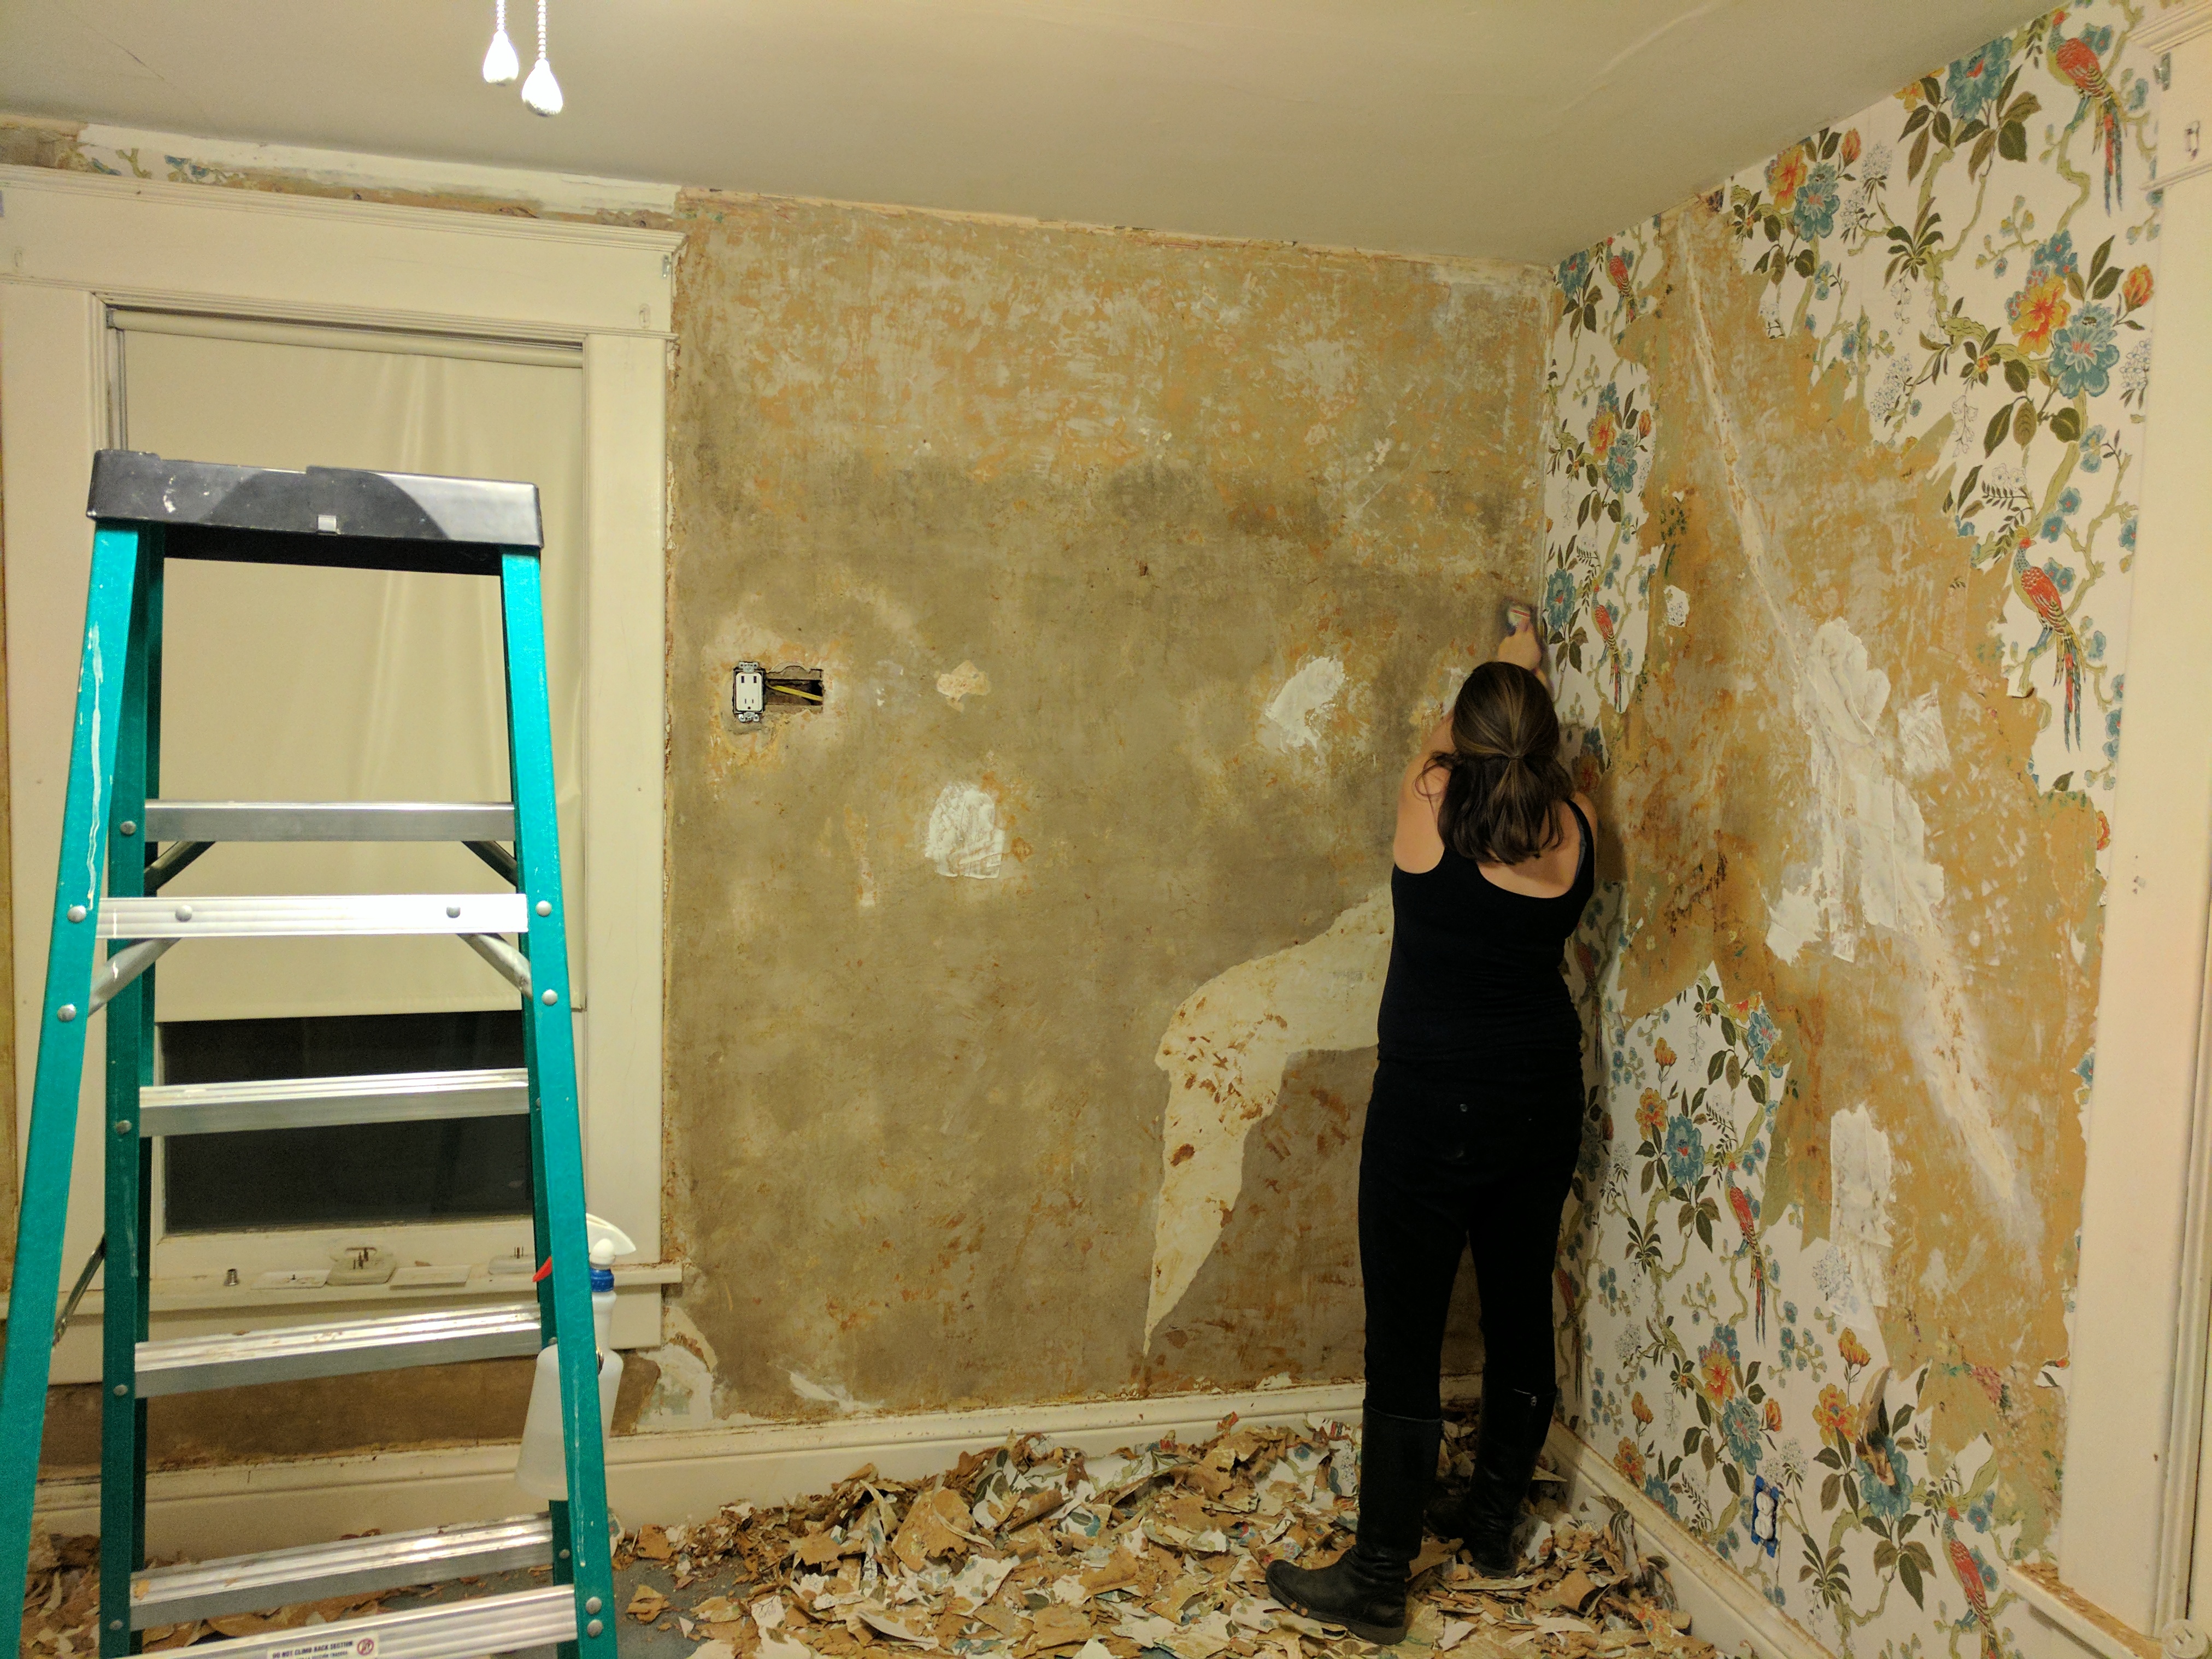
There were 3 layers of wallpaper in total, as well as an old border that was running along the top.

The scraping wasn’t as bad as it could have been, honestly. It took at least 4 solid days of scraping (largely completed by yours truly), but again, it could have been far worse. The dust got pretty bad, but we kept the carpet in for the time-being to let it “soak up” the debris so we could remove it later.
We did run into a little issue on one wall, though…

I started scraping it and the material underneath the wallpaper was quite a bit different than the other walls. This is the one that was on the bedroom door side of the room.

With a little more investigating, it turned out that, somehow, drywall had been used on that one wall. It’s possible that the wall had previous damage to the plaster, so the owners had to replace it with 1950s-era drywall, and then wallpaper over the whole room at that time. Indeed, there was only the top layer of wallpaper covering that wall, so the whole room was done at the time the wallpaper was put on.

On the wall adjacent to the drywalled…er…wall…we also ran into some large patches of joint compound that were directly wallpapered over, which slowed things down considerably. I ended up scraping off a layer of joint compound in a few spots…

After I got scraping done, Brooke came back through with vinegar water to clean off remaining glue, and then worked her plaster magic to patch the walls. You can see in the corner all the wallpaper that had fallen onto the carpet, so it was great fun tracking bits of trash throughout the house for a few days…
The rest will appear in another post. That’s enough pictures for now!
For the second part of this project, click through.
oh my goodness…………you leave us in suspense!
Gotta milk these posts while I’ve got them! It’ll go up tomorrow!
I still need to do kitchen ones too, apparently…