
When we were looking at this house, the main level had an interesting floor plan: it was very open with doors between the living room, the dining room, and this “extra room” that had a fireplace. It was referred to as a “den” on the listing, though its bay window provided enough light that “den” didn’t seem right.

This room also had some “extras” to it, specifically some additional woodwork that was not original to the house. They made up a bench, a toy box, and a series of “cubbies” that you could stash a variety of trinkets in. They didn’t look all that great to us, nor did the aged wall sconces, many of which didn’t work. When we had the electrical re-done, we kept the sconces next to the fireplace, but had the others disconnected.
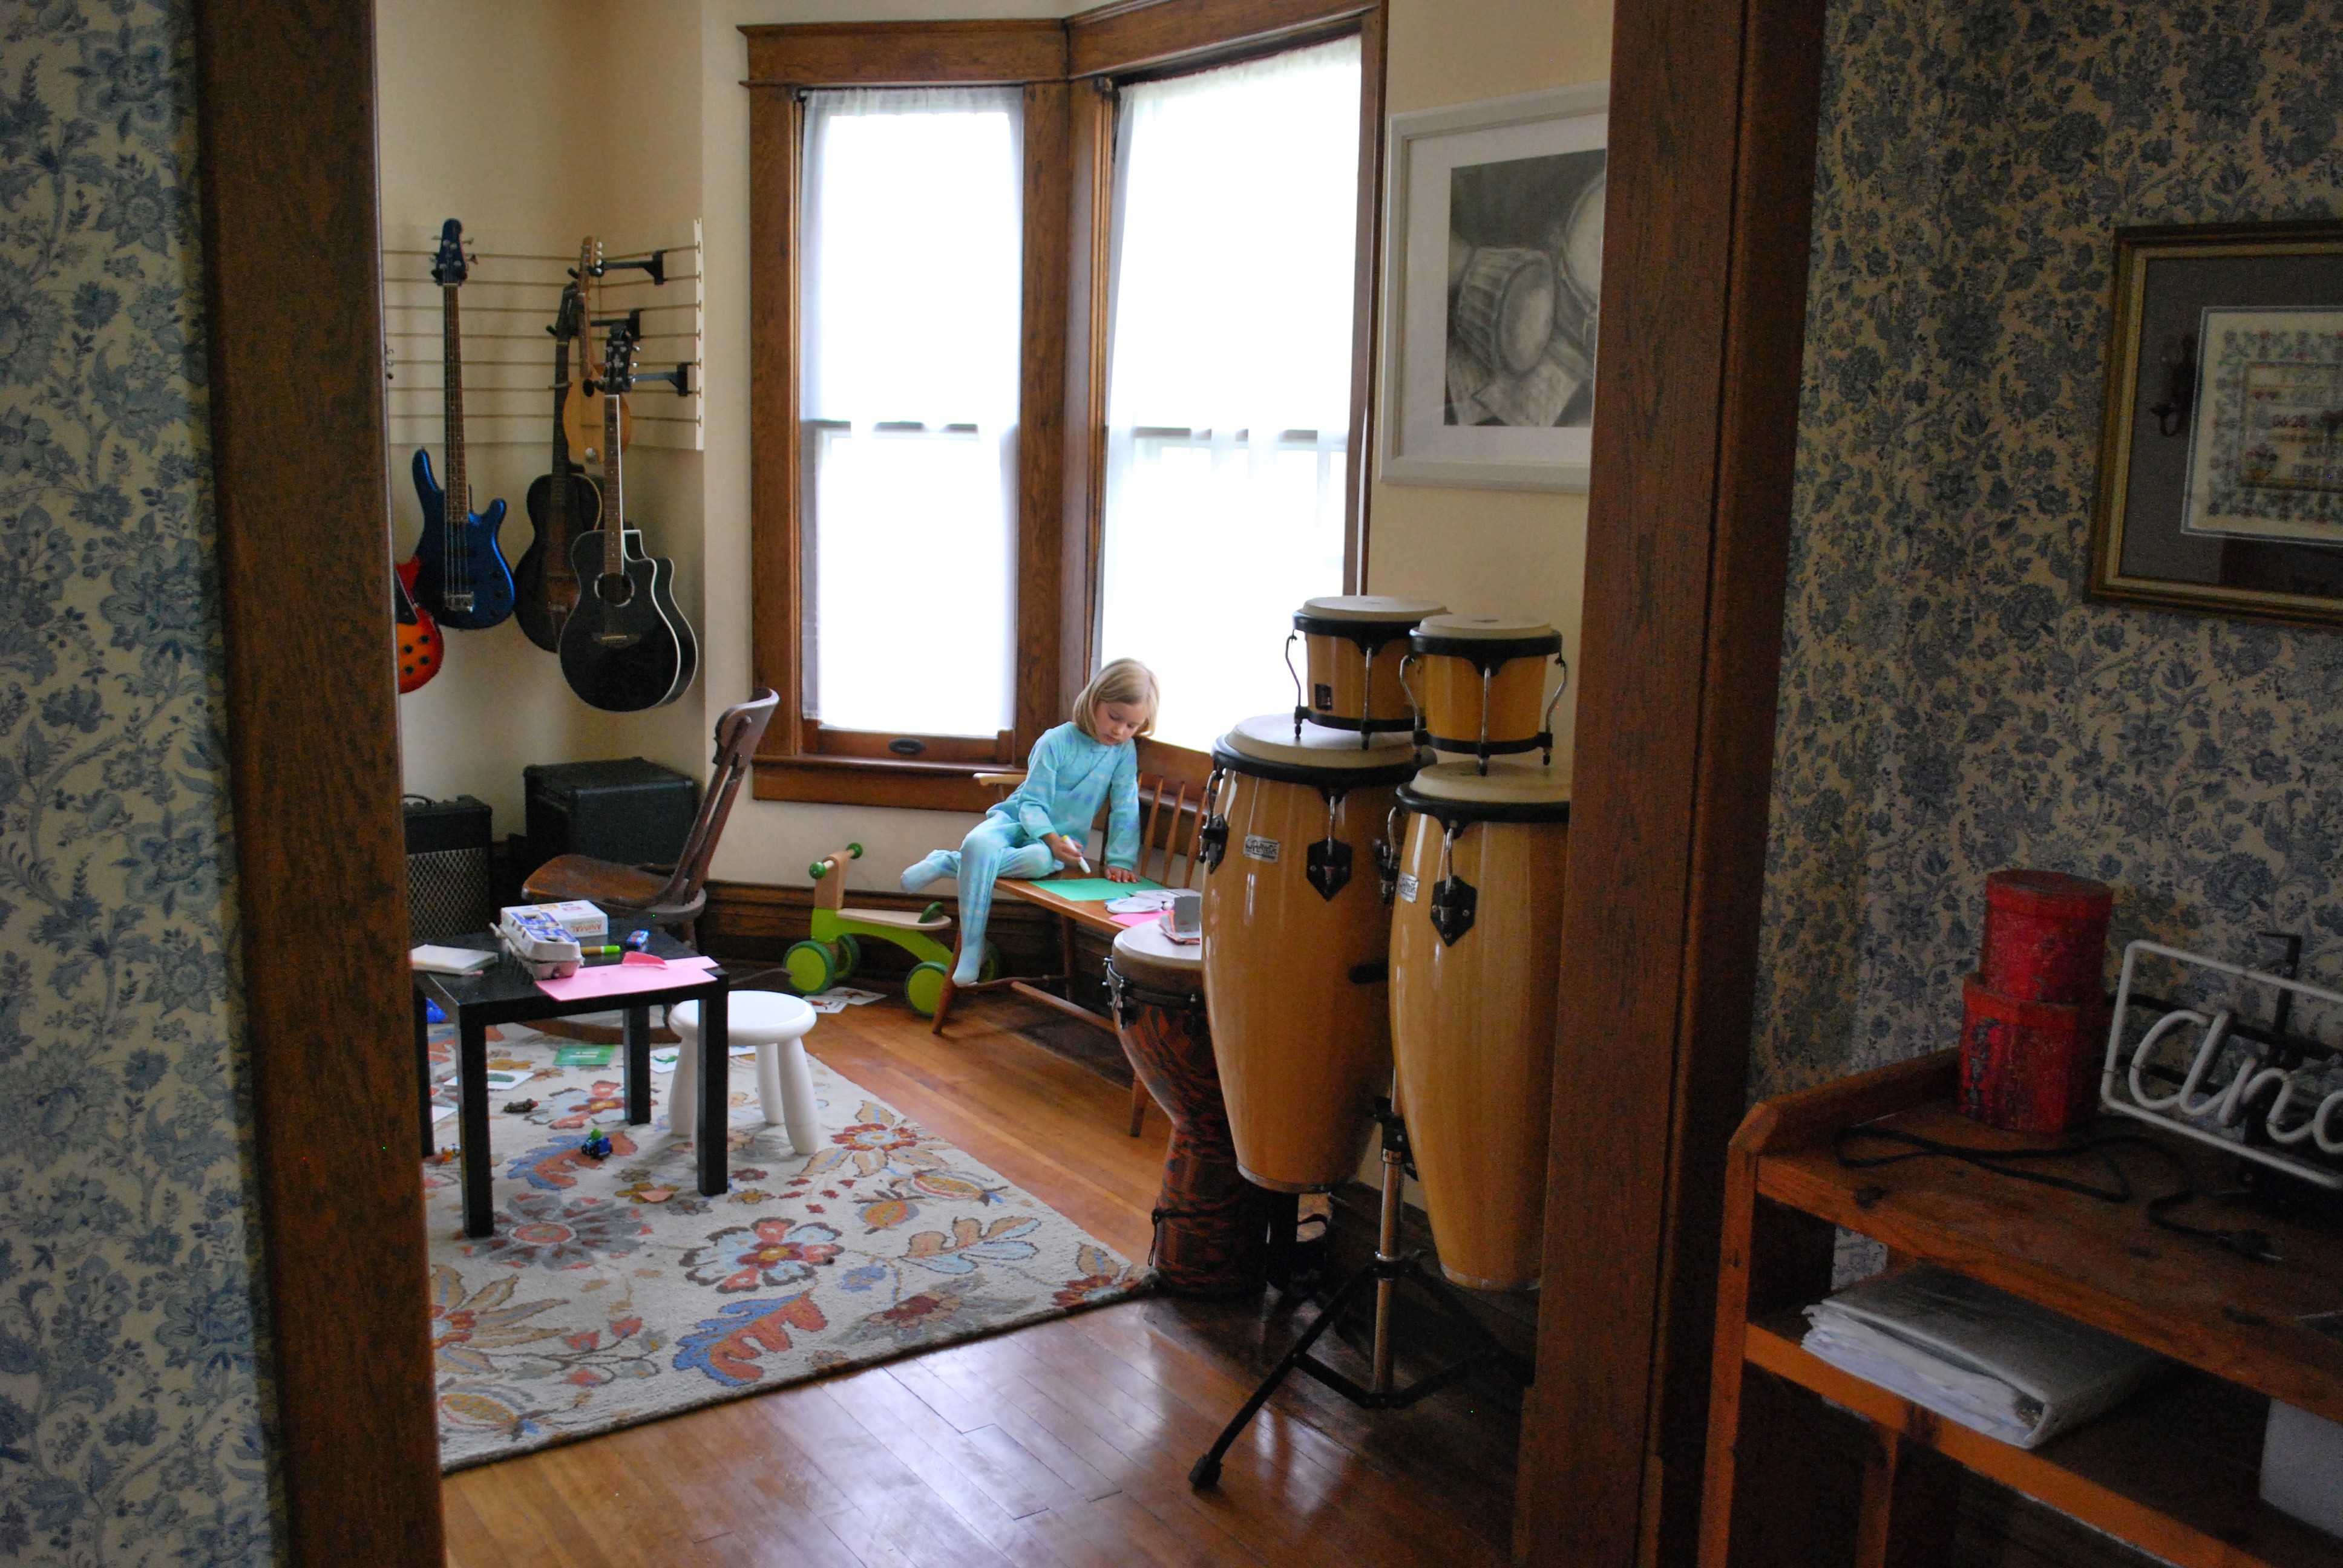
We decided to christen this space “The Music Room,” as we needed a place for all our musical instruments to go. The guitars would go up on the walls, the drums would be put, er, somewhere, and we’d also put the kids’ downstairs toys (i.e. everything that isn’t in their rooms) in here. Generally, we thought it would make a good play space for kids and adults. But, the wallpaper and extra wood had to go.

Brooke decided my Spring Break was a good time to get this started, so on March 13th, she took a day off of work and took a crowbar to the wood shelves. We found red paint on top of old layers of wallpaper behind them. Also, some plaster started to come along for the ride. Lastly, the floors were covered in dirt, much of which we ultimately couldn’t remove (without taking a sander to the floor…).

The wallpaper was hit-or-miss in its removal. We had a series of metal scrapers to use, as well as a spray bottle of dilute vinegar to loosen up the layers of wallpaper. And by “layers,” I mean four. Oddly, there were two layers of the same wallpaper…

…the same wallpaper, mind you, that was lined up and matched. Very weird. You can tell how dark that outer layer was, likely caused by decades of cigarette smoking. These outer layers weren’t all that much trouble, but the layers beneath this were more challenging. In total, it took a few weeks to get all of it off. We worked our way along the larger sections as best we could in the evenings, but weekends ended up being best, as scraping on the walls of the house tends to get a bit noisy when the kids are in bed. I stopped jogging in the afternoons after 3:00 so I could come home and keep working on it before picking up the kids.
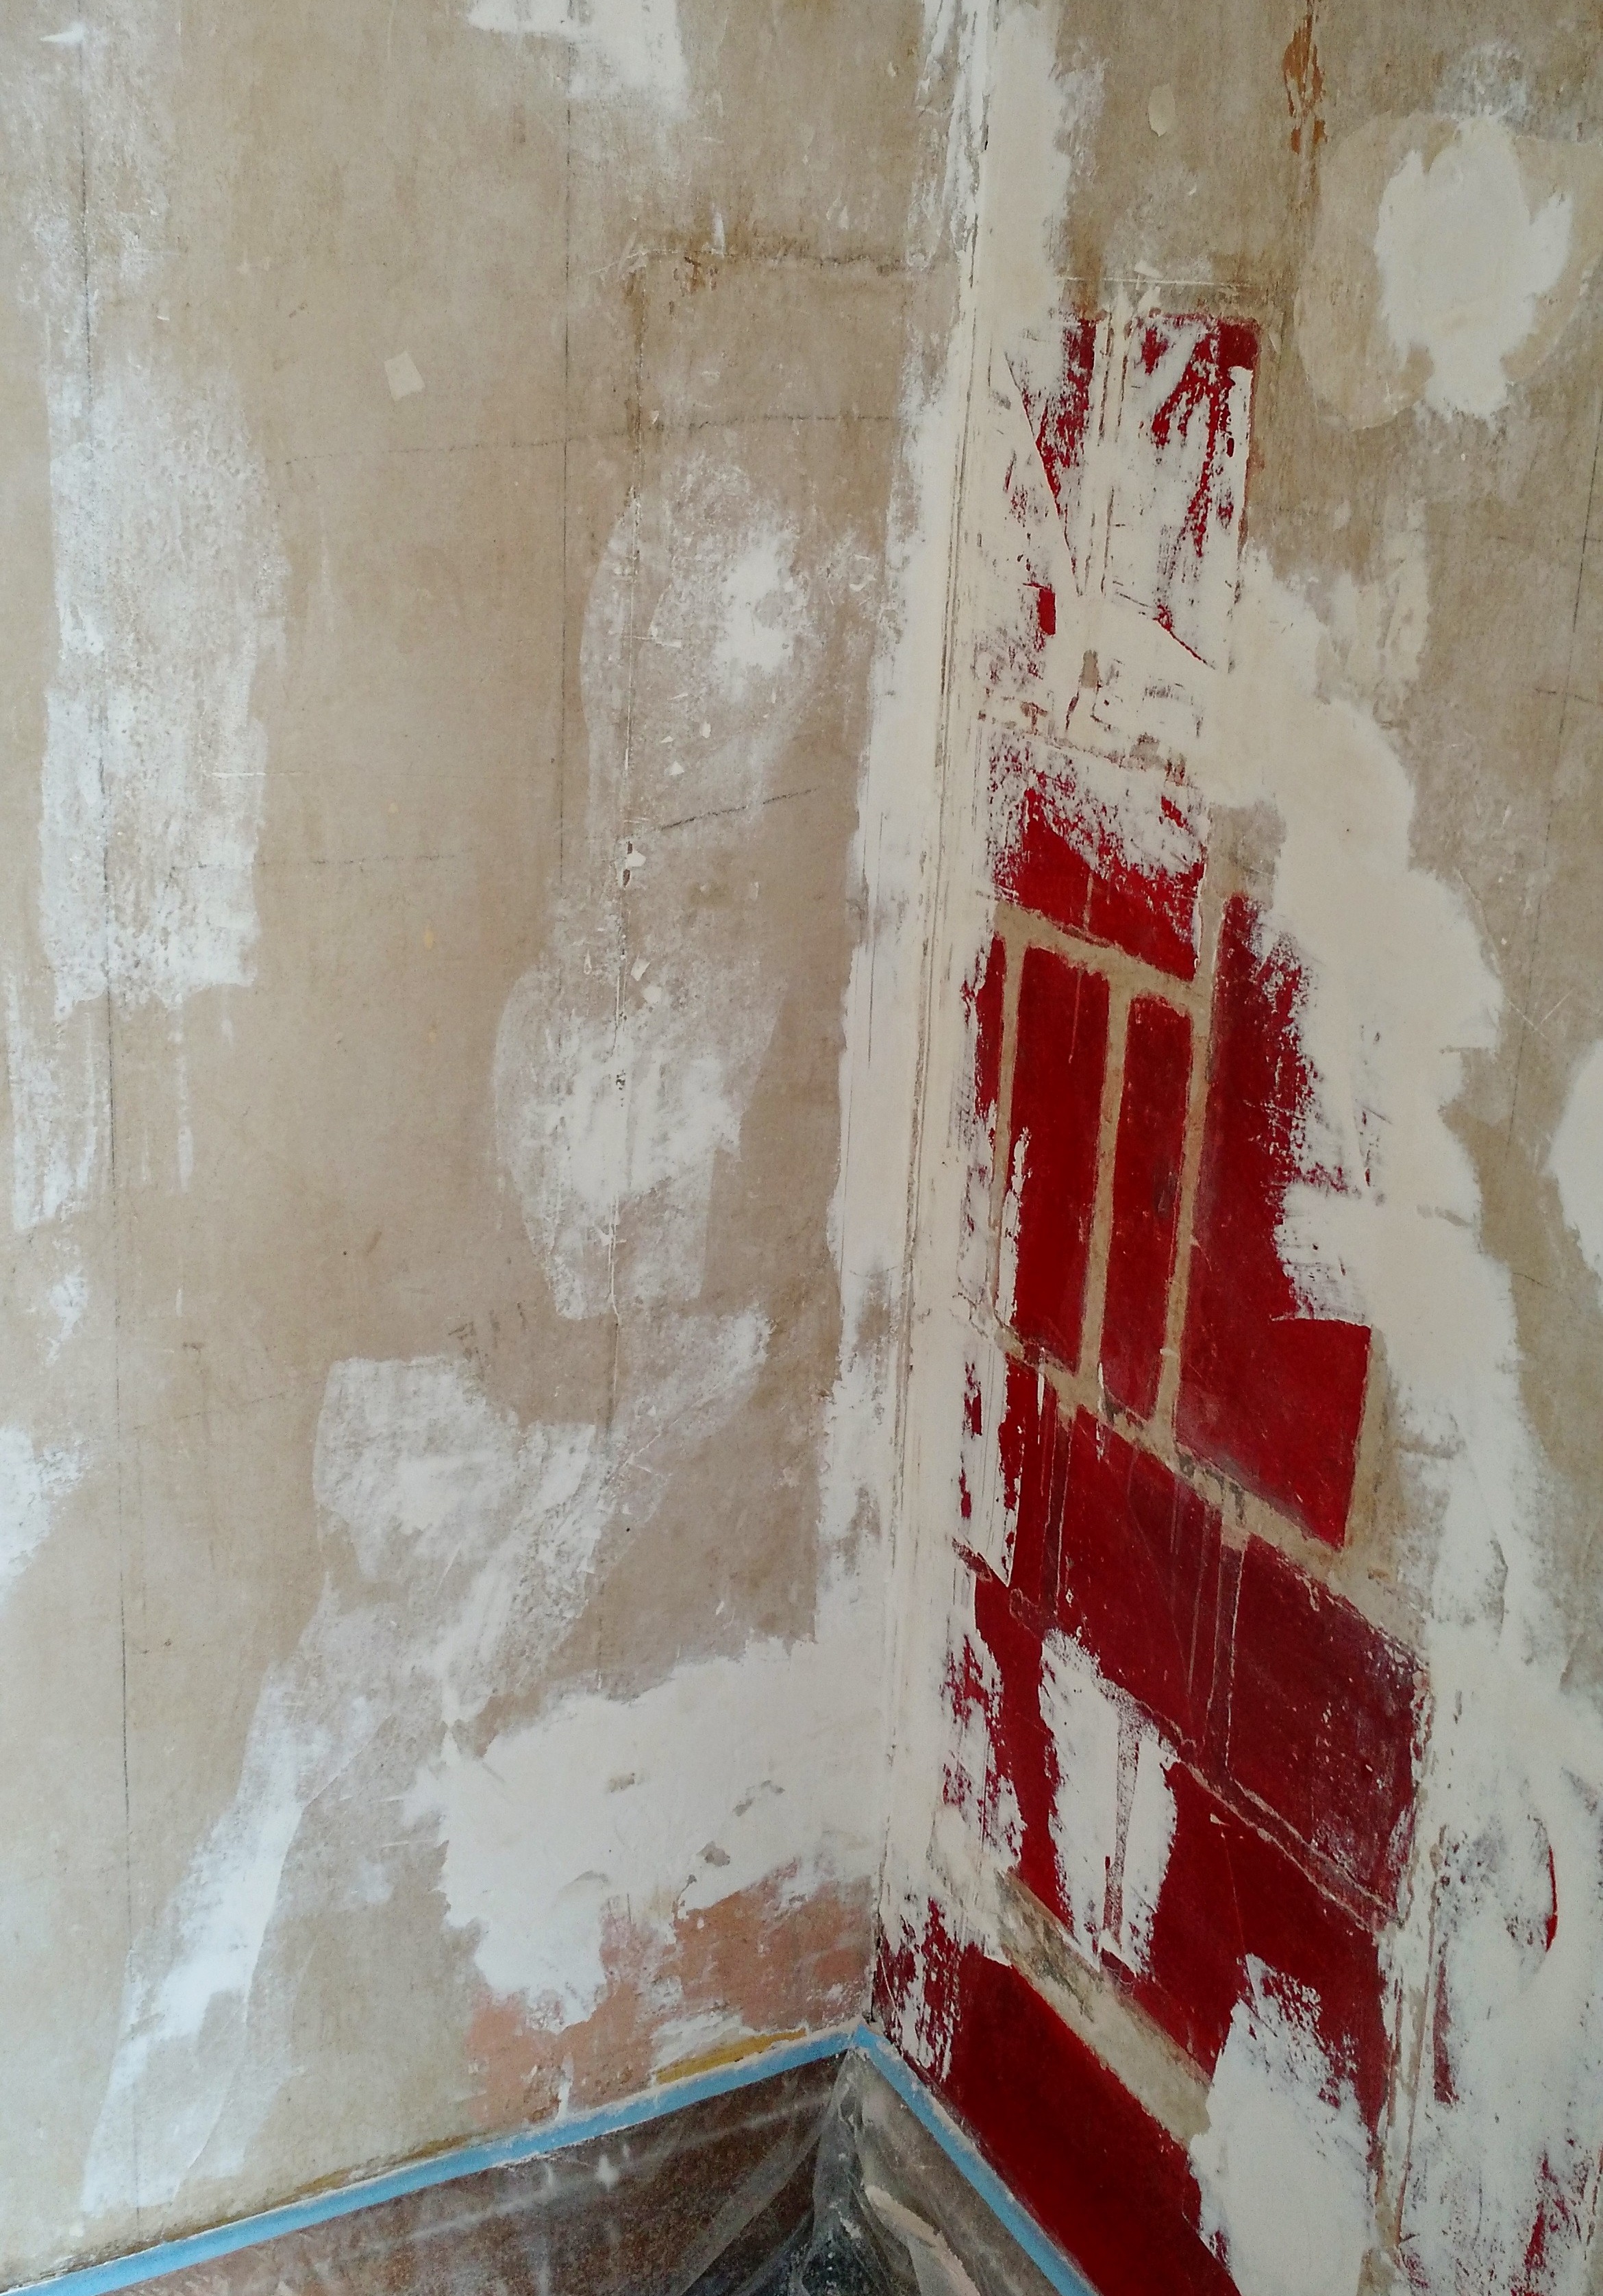
Ultimately, the walls underneath weren’t in terrible shape. We couldn’t remove the painted-over sections that were behind all the wood additions, as they were effectively sealed onto the wall. Brooke used a “screen mesh-style” sander to smooth everything out as best as possible. She also used a mix of plaster and joint compound to fill in the various holes in the wall. In the pictures above and below, you’ll see circular patches where a wall sconce used to be, that Brooke filled in with either plaster or joint compound. It just depended on how large the patch was.

We tried to be somewhat careful about the woodwork that we wanted to keep, so Brooke made sure to use plastic tarps to cover the fireplace and other sections of the room. The existing wall sconces didn’t put out much light, so we had to rely on them in the evenings, as well as a portable light fixture we brought in from the garage.

Eventually, after all the patching was done, we took primer to the walls. Lots of primer. Especially in these corners, where we were trying to cover up the red painted-over sections of the wall. We spent a few days priming to make sure we got good coverage. Brooke also had some plaster to fill in at points, so we had to prime over that, as well.
Brooke wanted to do most of the detail work…though, I was up on the ladder more. Getting around that bay window took some extra effort, as the wallpaper was somewhat difficult to remove.

The space above the fireplace cleaned up pretty well. For some reason, it seemed like the paint roller wasn’t working very evenly, though we never figured out why. It seemed like the previous owners played with joint compound a bit more than they should have, and laid wallpaper on it before the compound had finished drying. There were a few spots on these walls that featured near impossible-to-remove sections of wallpaper…
Finally, after about a week of priming, we put on the paint. We went with a color that would be similar to the old color, but a bit brighter. We also chose a color that was approved by the National Historic Registry, so it should be a color that was somewhat common at the time this house was built.
Brooke spent a good afternoon on hands and knees scrubbing the dirt off the edges of the floor. It definitely looks way better than it did on that first day after removal of the wood additions, but it’s still pretty noticeable. However, we’ve put some stuff along these walls, so perhaps it isn’t that obvious. When we have these floors refinished someday (after we don’t have a 1.5-year-old dropping things on it all the time), it’ll finally go away.
Also, notice that corner in the picture above. That was one of the worst spots, where Brooke had to put a few layers of plaster and joint compound to fill in the gaps.
The color during the day looked quite a bit nicer than it did at night! Brooke also made some lace (and later sheer…) curtains to go over the windows. In the picture above, they aren’t all around the windows yet, but the window facing the porch has it.
Also on that porch window, you’ll notice the toybox is still there. That’s a pretty functional piece of woodwork that we keep toys in, and can eventually hold blankets, pillows, and whatever else someday. Though it doesn’t match the rest of the wood in the room, it still fits the space pretty well.
The last thing to go up in the corner pictured above was the guitar holding system. We looked into a few options but decided to get the slatboard music stores use to display guitars. The main reason was so that we could add and remove guitars from the wall without tearing holes in it each time.
The guitar display worked out pretty well, we think. We primed and painted the panels the same color as the wall and positioned it at a level high enough to keep Calvin from it (for the most part…).
…also, we don’t know where that purple bin is going to go, yet…but it looks hideous and out of place in that room. It’s got all of Meg’s craft stuff in it right now, so we need some kind of replacement…

Here’s more of a “wide shot” of that section of the room, now with the sheer curtains over the bay windows, a bench Brooke picked up underneath the windows, the rug we used to have in the living room and moved into the music room, and the various instruments.
The last section to finish was the fireplace, which involved finding something to go above it, and finally replacing the functional sconces in the room. Brooke picked up the new sconces last week and we made my Dad install them on Mother’s Day (because it was Mother’s Day…so, Mom couldn’t do it…).
We couldn’t decide what to put above the fireplace, but Brooke found this canvas print that seemed to fit the vibe and color scheme we’d set up in the room. We may eventually replace it, but honestly, it seems to fit pretty perfectly right now, so I suspect we’ll keep it for a few years.
That’s it! Long process, long post! We don’t really have anything else in mind for upgrades on the house in the near future, though sometime this summer, I’ll likely get started on the kitchen, which needs a serious fix-me-up…


