Well, the garden’s finally planted. In some ways, I feel like it’s later than usual, but in other ways, I feel like it’s early (probably because we planted popcorn in, like, July last year…).
The tomatoes are in the rightmost plot this time and green beans and popcorn are in the leftmost, largest plot. New for this year, Brooke put in some cucumbers. The kids actually eat sliced cucumber sometimes, so perhaps we’ll get something useful…
Looks kinda desolate so far…
Brooke planted radishes, carrots, spinach and lettuce about a month ago now, but there was a massive rain (~4″ in a few hours…), so the seeds she’d just put in the ground shifted out of their rows and/or didn’t come up. Honestly, they look a little better than we expected, but we need to water the garden and get some grass clippings put in to limit weed proliferation. Last week was the first time I mowed the lawn (fully, at least), so I’m only now getting to the point where I’m mowing regularly.
Pretty flowers!
The “herb garden” section still needs a little more work, though. Brooke put some bulbs in last Fall and they came up looking all pretty-like. Some of the other perennials have returned, but we’ve added some milkweed and indigo from the Botany class on campus. Again, lots of landscaping to finish off.
Millions of peaches…
The trees have also had their flowers on already. Like last year, the peach tree had a bunch of flowers (and they didn’t freeze this time…yay!), but new for this year, the apple trees, cherry tree and almond tree also had some blooms. We’ll have to see if anything comes of it, especially on the apple trees where the buds were on the smallest of branches…
First harvest!
That’s it for now! We’ve got some radishes ready and the lettuce is moving right along, so onward, summer!
Brooke had been meaning to get into the hives for the past month or so, but the weather simply wouldn’t cooperate this Spring. March and April had very few warm-ish days and they were typically followed by long rain sessions. Then, if we actually had some good weather on a weekend, we’d be out of town and still unavailable.
Eventually, after Girl’s Weekend, Brooke was able to leave work early and open up the hives and see how the bees were doing. We’d noticed that there wasn’t much bee activity coming out of the hives on the warm-ish days, but again, as weather was back-and-forth for awhile, we couldn’t be sure whether there was a problem or whether the bees simply didn’t know what was going on with the weather situation.
Unfortunately, there were no bees. Our original hive from 2016 was completely empty and was likely “robbed” by another hive of bees. There was still some honey in the 2017 hive, but no bees to speak of, so they likely took their queen and swarmed sometime earlier in the year. The food Brooke put in late in Winter was still there, so it’s likely they left sometime shortly after she was last in the hive.
In many ways, we count ourselves lucky, as many beekeepers lose 1/3 of their hives in a given year and we didn’t lose any last year, so we were probably due to have something like this happen. We’re going to “re-set” the hive boxes to be lifted up a bit before putting any more bees in there, so in some ways, it’s a good opportunity to take stock of how we’ve been managing them and correct a few things before any new bees take up residence.
Thankfully, we’ve still got a decent amount of honey available to get us through the next few months. We think we may be able to score an extra package of bees from Brooke’s Dad in the next few weeks, depending on how his bees hold up. It’s the right time of year for bees to be delivered, so we’re hopeful that if Mark doesn’t end up having extra, someone else will, and Brooke has enough contacts now that we can probably get something going.
It’s been a long time coming. This Winter was quite a bit colder and, more recently, wetter than last Winter, so while we’ve wanted to get out in the garden to get things started, our schedule and the weather simply haven’t worked out.
Case in point, I was on Spring Break this past week and for the first 3 days of it, the temperatures were below 40 F and were rainy and gross. Granted, I was on Break and wasn’t particularly motivated to do anything, but oh well…that’s my excuse.
Regardless, Brooke ordered some seeds and tomato plants from Jung Seed, so we needed to get the ground usable prior to their arrival.
“Fire!”
For the last few years, we’ve kept the leftover stalks and grass clippings on the gardens for the season. Last year, Brooke burned it all and we opted to do the same thing this year (this time with a permit, so a bit more legal…). It was just windy enough to feed the fire, but just damp enough so that it would take a little time to burn it all away.
After the fires were done, I used the neighbor’s tiller to turn it all over and make it look all pretty like.
Healthy dirt!
I’m still impressed by how dark the dirt is after using it the past few years. We haven’t had to add much compost, though we did add some manure last year (just a sprinkling, really…not much).
The garden plots are going to get rotated again, but I’ll post more about that once we actually plant some stuff. For now, the plan is to put the carrots, radishes and lettuce are going to go where the tomatoes and peppers were last year. We’re planting all that stuff a week or two later than last year, but whatcha gonna do?
After setting up the new shared bedroom for Meg and Calvin, it was time to do something with Meg’s old room. However, after putting a week into that new bedroom, I wasn’t really in the mood to scrape even more wallpaper, so it was decided that the second room would be turned into a play room. In the interest of maintaining our sanity over this Christmas Break, we decided to leave the carpet and wallpaper for now and consolidate all of the toys into that room.
Well doesn’t that look cozy!
We now have another TV set up for the first time since living here and we have a Fire TV Stick on order to make it a little “smarter.” The only station it gets over bunny ears right now is PBS, but we can live with that. We’ve also got the Lego table set up in front of one of the windows.
The wall isn’t quite…”done”…yet…
Brooke had a crazy idea about the wall that will improve over time. As the kids draw more pictures and do more “art” at school, it’ll get clothespinned to the string she put up for all to see. The easel is also near two new tables we picked up from IKEA to replace the two we previously had, only this time, we put some chalkboard contact paper on it.
“Look, Mom! We can write on the table and erase it again!”
Honestly, I’m not quite sure how the contact paper will last on the tables, as they’re also intended for Play-doh and other things. The idea was that roads and towns could be drawn on it for Legos, cars, etc. We’ll just have to see how they use them…
Storage!
The last wall involved a purchase of a 9 cube organizer and some bins so we could put all those toys in a mostly central location. Their Kindle Fires can be charged because of the port behind the shelves, so that’s where they’ll live and not in the bedroom (unless it’s during the day). Hopefully we can foster some better habits that way.
It’s going to be a work-in-progress for awhile, but it’s more organized than before! And now the Music Room downstairs has many fewer toys just lying around because they’re all upstairs! There was also a “culling” of baby toys that the kids otherwise wouldn’t get rid of on their own, so this was a good opportunity for “Winter Cleaning.”
So, the scraping started on a Tuesday and we were mostly done by that Friday, though we got slowed down by the kids getting released early from school due to weather. That, and we were heading to my parent’s house for Christmas stuff that weekend.
As a brief aside, we were on the road to Columbia for 4.5 hours that Friday due to the weather. That trip should only take an hour. It was great fun. Ug.
Gotta get all primed…
Anyway, after we got back from Columbia, we finished patching things up and finished scraping the walls so that, on Monday, I could prime everything and paint on Tuesday. We had to go with 2 coats of primer in most places, including the trim, and went with 3+ coats over the wallpapered section of drywall that was unscrapable. We’re hoping the water-based paint doesn’t cause the paper to bubble up, but considering just how stuck it was to the drywall, we don’t anticipate too much trouble. All the primer was enough to hide the floral designs underneath.
We went with an “off-white” color for the trim so we wouldn’t have to do the doors and windows quite yet…
The trim got a somewhat “off-white” color. Bright white would have been preferred, but at this point, we really didn’t want to take the doors off the hinges or fight with the windows, so we figured this color would at least half-way match the doors/windows while still meshing well with the chosen paint color.
More of a blue-grey for the rest of the walls.
Like we did downstairs in the music room, Brooke went with a color that was approved by the National Historic Register. The picture above still had wet paint, and the lights were off, but you can see the blue-grey hues pretty well. We went with 2 coats of paint for most of the way around and, thankfully, it dried pretty quickly.
While we were doing the painting, Mom and Dad were downstairs assembling the twin-sized bunk beds so we could just carry them up the stairs when we were ready for them. The room couldn’t really fit more than 3 people anyway, so it was a good way to divide and conquer.
Pulling the carpet up went remarkably well…
Once the paint was dry, we pulled up the carpet. Dad and I did this the winter after we moved in on the landing to the top floor, so I drafted him into helping for another round. The hardwood was very much intact, though the color differences between the middle and outside of the room was a bit odd. Again, someday, we’ll re-finish the upstairs but, for now, rugs will have to suffice…
All done!
After carrying the bunk beds upstairs, laying down the rugs, and installing the new curtain rods and freshly dyed curtains (repurposed from those that were in the room to begin with, but now a darker navy color), we were all done! We also moved Meg’s vanity (my grandmother’s, but painted last winter) into the room to give them a little bit of storage.
We’ve made it clear to the kids that this is a “sleep room” and not a “play room,” so with the exception of a few stuffed animals, no toys are supposed to be in the room. Clearly, this is easier said than done, but we’re going to try and keep it that way for the time-being. Hopefully that’ll stave off any markers on the walls for a few, er, days…
A view of the other corner…
Meg’s old bed was moved in and new sheets/blankets were added to match the bunk beds. Obviously, the bed color is different, but oh well… It’ll serve as a good guest bed should we need one!
Calvin enjoying his new big-kid bed!
Calvin was at school while we got all this done, so he was pretty excited to lay in his new bed! He had a toddler bed after his 2nd birthday and, while he still fit in it, the twin sized bed is substantially larger! He’s slept in big beds already, but this new spring mattress should be a bit more comfortable.
Meg’s up in the top bunk!
Meg’s up on the top bunk, as she’s the older kid. Eventually, we can relax for Calvin, but for now, he won’t be sleeping up there. We’re doing our best to keep him off the top bunk unless a grown-up is upstairs to monitor their play time, but again, this is easier said than done…
We’re pretty pleased with what we were able to accomplish in about a week! It certainly went faster than the music room did! And help from Mom and Dad was greatly appreciated!
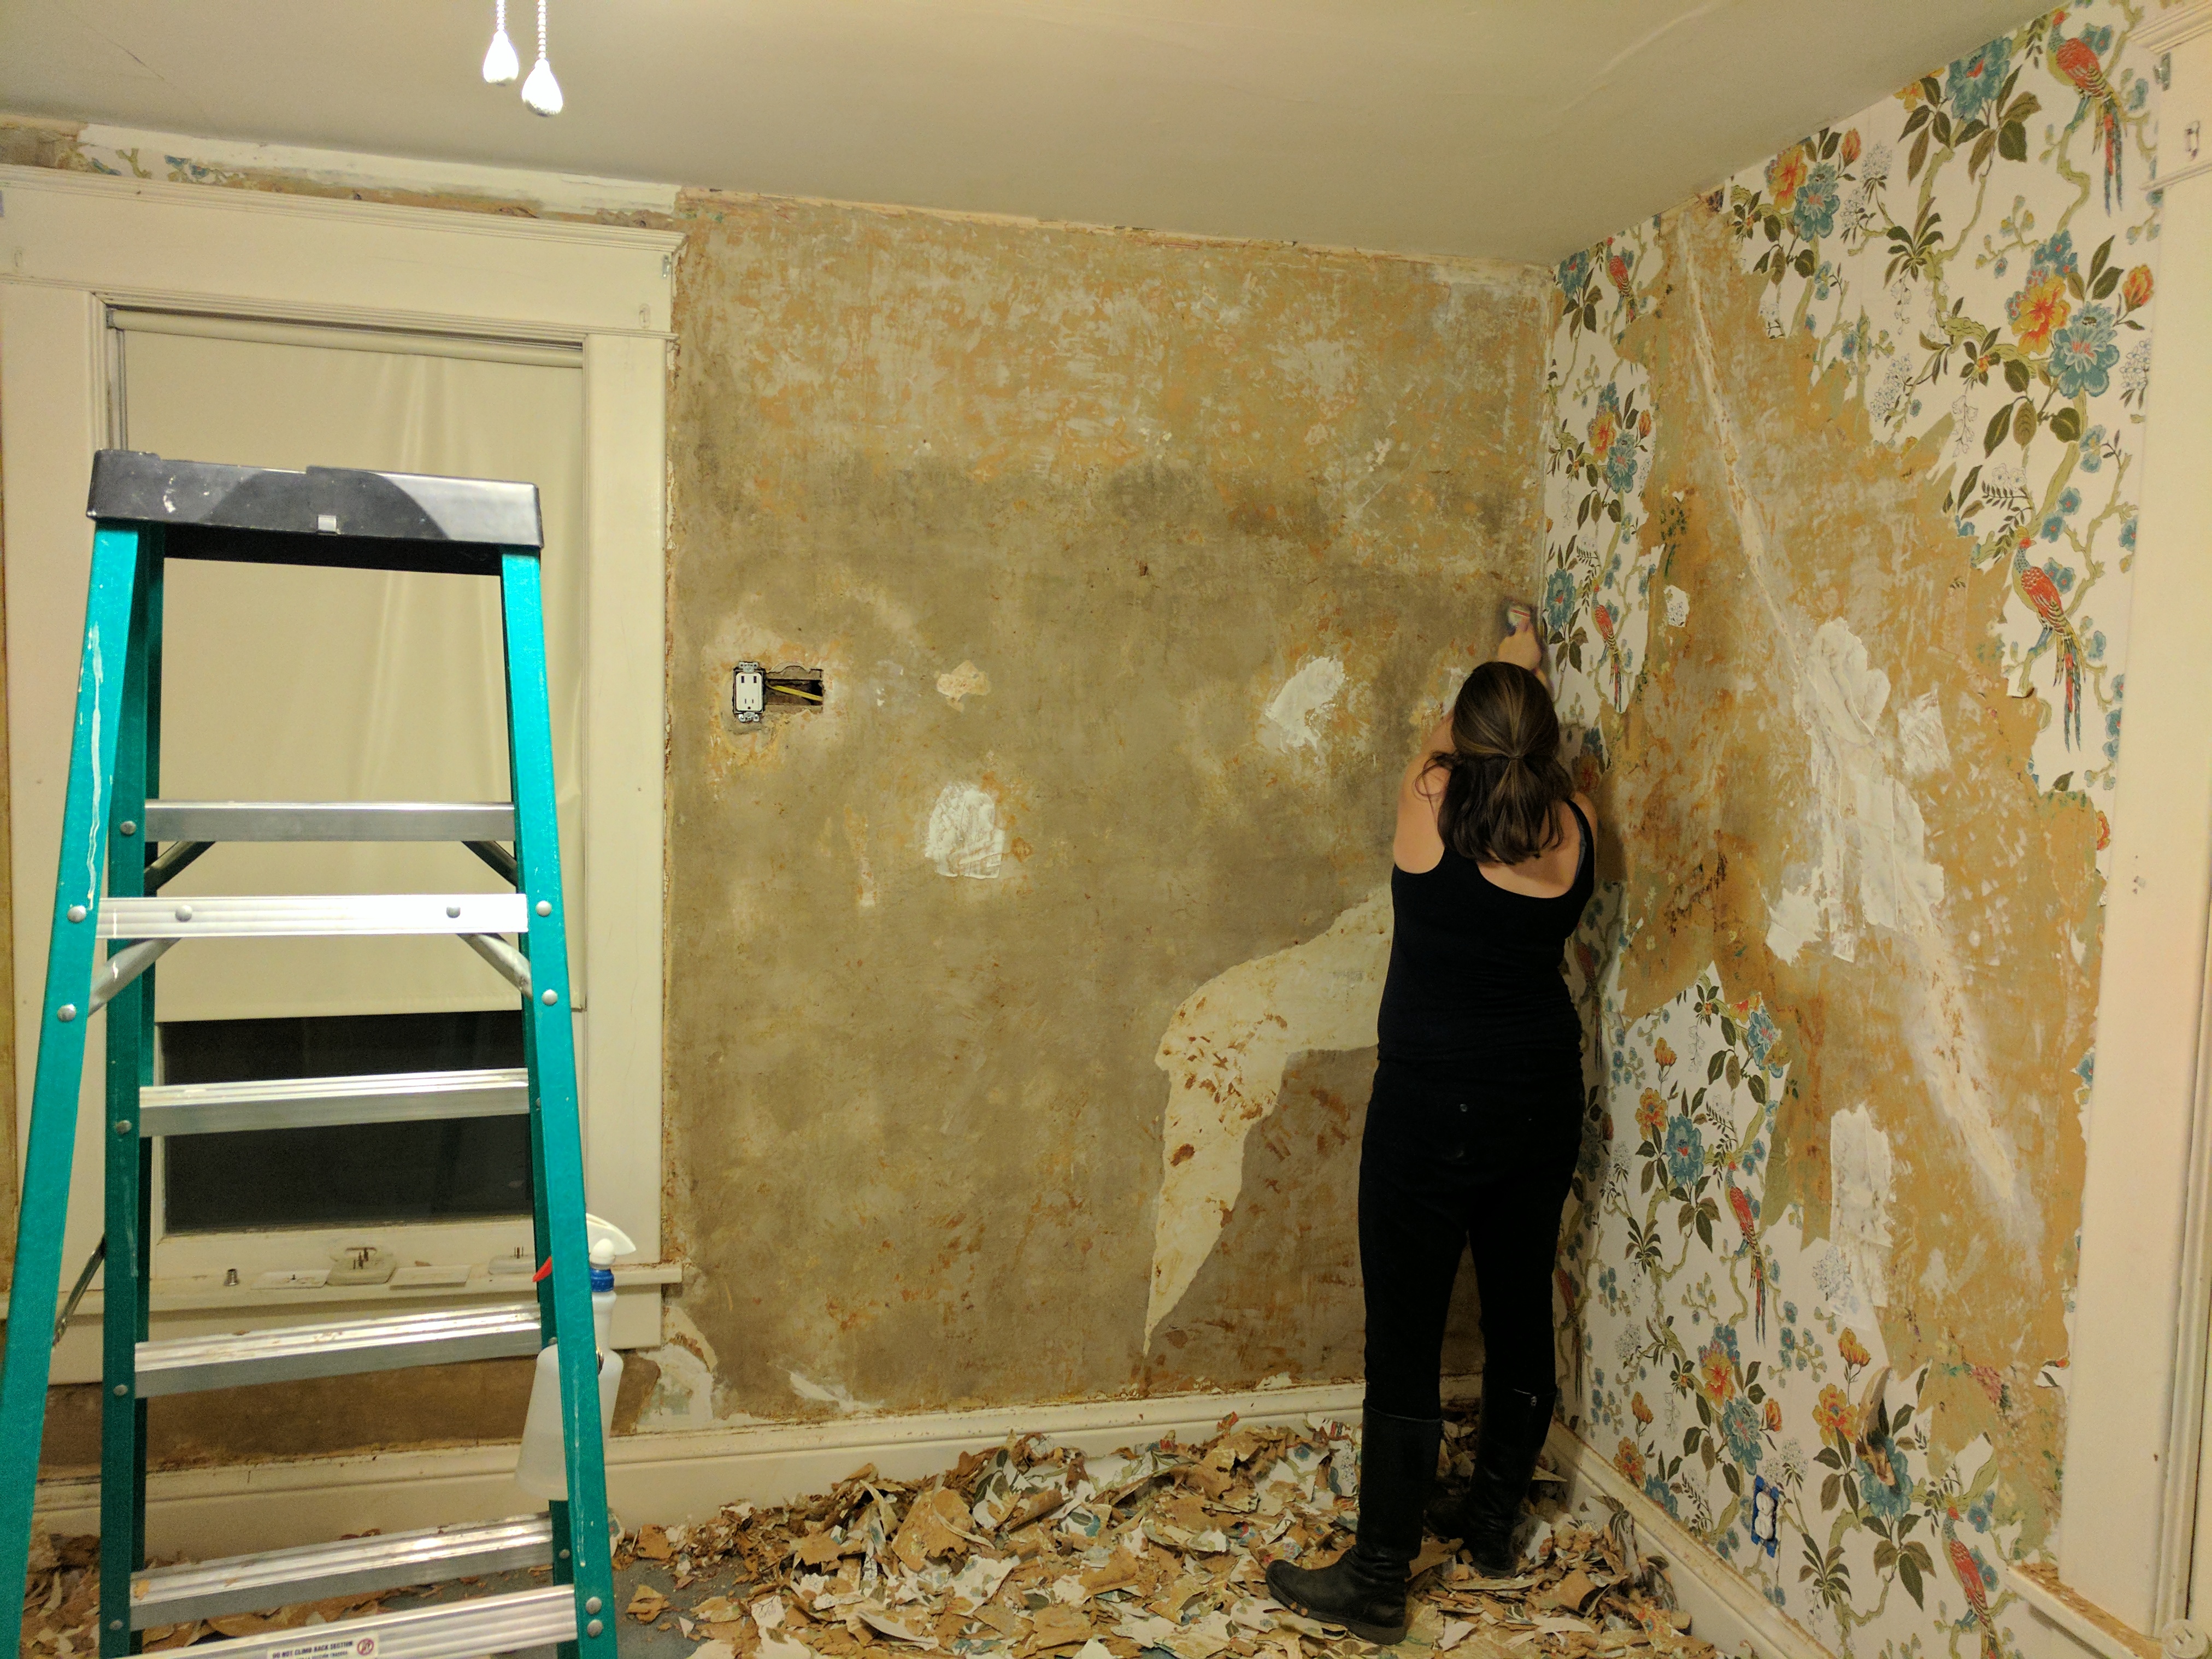
So, Calvin’s been sleeping in a room with creepy quetzals (or some other bird…I’m not an ornithologist) since we moved in, but we’ve left it up until we could decide what the long-term plan was for the bedrooms, and also because we had other projects on the docket first. A few months ago, the kids started sleeping together on weekends and, for the most part, they’ve done pretty well with this arrangement. The idea of bunk beds came up at some point, so we all decided that the kids would share a bedroom for a few years, and the other room would serve as the kid’s “play room.” For various reasons, Calvin’s room seemed like the better choice for “sleeping,” while Meg’s substantially larger space would become the “play room.”
It begins.
As we already knew, plaster was behind the wallpaper. Some parts of it were cracked, necessitating patching with plaster and joint compound, but there wasn’t substantial damage to the plaster like we had down in the music room.
There were 3 layers of wallpaper in total, as well as an old border that was running along the top.
In this image, you can make out the green-ish wallpaper underneath the “quetzal paper,” as well as a border along the top.
The scraping wasn’t as bad as it could have been, honestly. It took at least 4 solid days of scraping (largely completed by yours truly), but again, it could have been far worse. The dust got pretty bad, but we kept the carpet in for the time-being to let it “soak up” the debris so we could remove it later.
We did run into a little issue on one wall, though…
…a little hiccup…
I started scraping it and the material underneath the wallpaper was quite a bit different than the other walls. This is the one that was on the bedroom door side of the room.
…yup…that’s drywall…
With a little more investigating, it turned out that, somehow, drywall had been used on that one wall. It’s possible that the wall had previous damage to the plaster, so the owners had to replace it with 1950s-era drywall, and then wallpaper over the whole room at that time. Indeed, there was only the top layer of wallpaper covering that wall, so the whole room was done at the time the wallpaper was put on.
There’s a special place in Hell for people who wallpaper over joint compound…
On the wall adjacent to the drywalled…er…wall…we also ran into some large patches of joint compound that were directly wallpapered over, which slowed things down considerably. I ended up scraping off a layer of joint compound in a few spots…
Ready to prime!
After I got scraping done, Brooke came back through with vinegar water to clean off remaining glue, and then worked her plaster magic to patch the walls. You can see in the corner all the wallpaper that had fallen onto the carpet, so it was great fun tracking bits of trash throughout the house for a few days…
The rest will appear in another post. That’s enough pictures for now!
Now that September is nearly over, the garden’s pretty much done for the year. This past week, the highs were still in the low 90s and the sun stayed out, so we ended up turning a few more tomatoes red than I expected to, but overall, we’re in a “down year” for our tomato crop. The corn has dried out pretty effectively, though we haven’t tested the kernels to see if they “pop” as they’re supposed to.
The peppers have mostly died out, though the coyame peppers keep on producing. Brooke’s been spending most of her garden time dehydrating peppers, then dicing them up to make pepper flakes (for some unknown, future purpose…). The margaret peppers never really did much, though we did get some peppers off them. The peppers definitely produced, but I just don’t remember getting all that many off the plants. This is probably because margaret peppers are intended as “red” peppers, so I wasn’t picking them in their “green” state. As such, sometimes they’d shrivel up before we’d get to them.
A few ‘maters in there…soooooo many peppers…
The coyames, alternatively, turn red and then stay red for awhile, giving us the time to pick them. Of course, they’re hot peppers, so not exactly the kind of thing I’m going to slice up and slap onto the grill. Oh well.
Pumpkins!
The pumpkin story is yet to be completed. The plants died out pretty rapidly, leaving behind at least 15 little orange pumpkins. Beetles got to them, but I think we’ve still got a few viable ones out there. Brooke tried spreading some Sevin on them, as that was a pesticide that she could carefully avoid contaminating bees with, but we aren’t sure how much it helped. We’ll see, I guess…
Herb(s)!
The basil took over the herb garden. Lavender, oregano and lemon balm are still doing quite well, but weeds have invaded this area of the garden. The sunflowers aren’t looking great anymore, but I think Brooke is planning on using them for something.
Overall, I think the “herb garden” was pretty successful this year, though processing everything else has detracted from our use of it. Which is to say, there’s a lot of fresh stuff in there, but Brooke needs to spend more time dehydrating oregano and basil for later use, and less time dehydrating peppers. Still, a good problem to have!
Trees!
I wanted to include another picture of the trees, as they’ve done remarkably well. The pear trees are still lagging behind the others, as they got hit by Japanese beetles, but the trunks have grown quite a bit in recent weeks, so I think they’ll make it through the winter and come through stronger than ever for next year. I can’t remember if we should see fruit yet next summer, but I can at least plan for the trees to survive…
Meat! …wait…what?
We ended up getting access to some “pork ends” from a co-worker of mine. $20 for 60 lbs of leftover cuts. Some of it was definitely better than others, but Brooke ended up grinding 20 lbs of it by hand (then vacuum sealing it and freezing it), followed by some additional portions she saved for cutting up (i.e. various purposes), and lastly the leftover “fatty” portions for rendering. If I recall, she ended up getting maybe 4 lbs of fat off what she saved.
…quite a bit of processing went down…
It brought back some memories for Brooke, who used to work behind a meat counter. I’m not sure she’d like to do this all the time, but for the money, we ended up getting quite a bit of usable pork to use this winter.
That’s probably it with regards to “garden updates” for 2016! The highs this next week are in the 70s, so while we’ll get a few more tomatoes to ripen, it certainly won’t reach the heights of tomato juice production we’ve had in past years. Brooke has a few buckets frozen downstairs, but again, I don’t anticipate she’ll get more than a few quarts. Perhaps we’ll be pleasantly surprised…
I realized I hadn’t posted an update since late-June, so I figured I ought to add some more pictures. Overall, the garden’s finally starting to yield some produce. It sure looks healthy, for the most part, though we’re still in waiting mode for many parts. The pumpkins took over this section of the garden, and have continue into the rest of the yard. There is a single watermelon plant somewhere in there, but considering how voracious the pumpkins have been, I don’t expect them to make much. We’re having to keep the pumpkins out of the tomatoes, so keeping an eye on their growth has almost become a full-time job…
Popcorn!
The corn has tasseled and has some ears on it, finally. Brooke pulled up the carrots weeks ago, so she planted some peas on the other side of the corn in hopes they’ll do something for the Fall. There are some little plants growing slowly, but it’s still too soon to tell if we’ll get anything out of them.
Peppers, tomatoes, etc.
The coyame pepper plants have gone insane. These were some free seed packs from Monsanto that we inherited and, believe you me, those geneticists know what they’re doing. They’re similar in hotness to jalapeños, so Brooke will probably end up drying them and grinding them into chili powder. The margaret peppers we planted aren’t doing quite as well, though we’ve still harvested a few. They’re closer to regular ol’ bell peppers. That sad little wilty plant in the middle of the picture is a margaret pepper plant and we’re trying to keep ‘er going. It’s got some peppers on it still that we’d like to continue with.
The bean plants in the background are also moving alone. The green beans are mostly done at this point. We ended up with around 2 gal of fresh green beans that we ate on as we picked them. We’ve still got cans of beans downstairs from previous summers, so Brooke wasn’t quite as ambitious this time around. The soup beans are coming along nicely, and the edamame (read: soybeans) are producing a metric ton, so we expect to do pretty well on that front.
Some beans and such from last week.
Otherwise, the tomatoes are still coming along, albeit slowly. They really got hammered by the hail a few months ago and it seems like that hampered their growth on the north side. There’s also something eating them that we haven’t been able to identify. It isn’t squirrels or rabbits, but likely some kind of caterpillar or other insect, as we’ll find random holes through all the good ones. Still, it seems like that’s slowing down and we’re starting to get them now. If they continue, we should end up with a healthy number of roma tomatoes and other “slicer”-varieties.
Herbs!
Lastly, the basil, lemon balm and oregano really took off since the end of June, let alone the sunflowers. The lavender has slowed down quite a bit, and the lettuce is done. The comparable picture from June of this section of the garden sure looks sparse!
That’s good for now. Weeds are slowing down and we’re having to supplement our watering now, which isn’t too surprising. We ended up with 4 in of rain last week when we got back from our vacation, but the ground drank it all up and we had to water again shortly thereafter.
I should also note that Brooke’s been using Sevin dust on various leaves to kill off the Japanese Beetles that are still going after our plants, especially one of our peach trees. We’re finding them on some other leaves too, but Brooke’s trying to keep it away from the flowers so she doesn’t influence the bees. For now, the trees are fine, but we’re having to keep an eye on them.
The garden’s looking pretty good since Brooke and I spent hours last weekend weeding it, so I figured I should post something before it’s hideous again. Here in the forefront, the pumpkins are starting to look pretty good, but the squirrels dug out one of the hills, so one series of watermelon plants is down. Hopefully we get something out of the three plants that are still there, but again, they won’t be ready until September anyway. The tomatoes, on the other hand, are doing remarkably well. We’ve found three or four “volunteer” tomato plants that we’ve plugged in where we lost some to hail and, thus far, they’re doing pretty well. We’ve even got some tomato plants flowering!
Tomatoes and pumpkins
The bean plants are looking really good (the main reason I wanted to take pictures, really…), though some of the soybeans are smaller than I’d prefer. The green beans and soup beans, as usual, are going gangbusters, so we’ll end up with a good crop of them. I’ve staked two of the pepper plants, as they were starting to grow more “sideways” than “up-ways”, though two of the plants are still looking pretty small, so I dunno how they’ll ultimately turn out.
Herbs
The herbs are looking a lot better now, after supplementing with some larger plants a few weeks ago. A few of Brooke’s original seed starts are still with us (cosmos, aster, basil), but I added oregano, lavender and lemon balm. The lettuce is looking awesome and we’ve eaten some of it already. The sunflowers, seen in the background, are also starting to really take off.
Trees
Lastly, the trees seem to be doing alright, though their growth has slowed down. We got 2.5 in. of rain a few days ago (finally), so I don’t feel the need to water them this week, but I had to run a hose out there to each tree the last two weeks due to lack of rainfall. I trimmed a few of their low hanging branches the other day too, as I’d rather them grow “up” rather than “out” at this point.
Everything’s still growing! I didn’t bother taking a picture of the popcorn, as there isn’t much to see yet. We’ve got some plants growing, but they look pretty sparse. It remains to be seen whether anything will come of them, but we’re treating them as more of a “test” than anything else.
First of all, let me say that it’s been along time since I got anything posted up here, but now that school’s out for the summer, I should be able to post stuff more regularly.
Otherwise, it’s that time of year again when I start posting garden-related stuff. We’ve expanded into another section of the yard, but mostly I wanted to focus on what’s growing and what isn’t. Up top, we’ve moved the tomatoes to the larger plot this year. Last year, we went with a similar configuration, but had the two trellises really close to one another, not knowing how well the plants would do. Well, they did really well. Almost too well. To the point where light couldn’t get between the trellises. Thus, we’ve put them as far apart as possible and will likely not put anything between them. 19 different plants are in there right now, ranging from “slicer” tomatoes to “cherry” tomatoes to “heirloom” tomatoes.
Some carrots, peas…and weeds…
The other plot we planted in turned out pretty good. The carrots are over-run with weeds and Brooke made a valiant effort (in the right foreground) to de-weed them. The peas are moving very slowly, but there are some buds on there, so perhaps we’ll get something. We dug up all the radishes on Tuesday night…
Radishes!
…and ended up with a solid haul. There are quite a few “heirloom”-type radishes in that mix that I haven’t tried yet, as they sure look awful “root-y” to me, but we’ll see. It was a mixed back of radish seeds, so we knew we’d end up with some different varieties. Still, we’ve got a few gallon-sized bags in the crispers to munch on for a bit.
Blackberries and raspberries.
The berry bushes have been doing remarkably well. We’ve seen some flowers on the blackberries for a few weeks now, while the raspberries are taking it a bit slower. There are some starts popping up, but compared to their nearby brethren, it may end up later in the season before we get anything from them.
Trees!
All of our trees are doing well, too! We had to water them quite a bit early on, but it’s been rainy these last few weeks, so it hasn’t been quite as essential. All of the tree varieties have leaves on them, though the pear trees are moving slower than the others. The almond tree is probably doing “the best,” but the apple trees are close behind.
Back of the house
Lastly, I wanted to mention the back of the house, which is a bit more manicured than it was at this time last year. I’ve been using some herbicides on the left-hand mulch to prevent stuff from popping up, so that’s making it stay pretty clean. We were initially going to try and remove all those hostas, but we changed our minds and we’ll just have to remove the weeds from around them by hand. We’ve also got some concrete bricks lining that bed now, so it looks just a little bit nicer.
I don’t have much going on this summer, so I’m hoping to get a lot more gardening in. More posts to come!